
|
Nothing fancy here. Just a good solid soup. Who doesn't love that? I'm just super excited that my entire family eats it, so I'm sharing it with ya. Enjoy! Black Bean Soup Makes about 9 cups 1 large carrot, chopped 2 medium stalks celery, chopped ½ large onion, chopped 3 cloves garlic, smashed 2 teaspoons ground cumin ½ teaspoon ground coriander ½ teaspoon Mexican oregano 4 cans black beans, drained 4 cups chicken stock ¼ cup masa harina Salt and pepper to taste Lime to taste Pico de gallo Crema or sour cream Avocado Queso fresco or feta Heat a pot to medium. Add carrot, celery, onion, and a pinch of salt. Cook, stirring occasionally, 6-7 minutes. Add garlic, cumin, coriander, and oregano. Cook 3 minutes adding water if needed to keep from sticking. Add beans, stock, and masa harina. Simmer 10 minutes. Using an immersion blender, blend the soup until it's about 70% smooth. Season with salt, pepper, and lime to taste. Top with pico, crema, avocado, and queso or feta. Done. 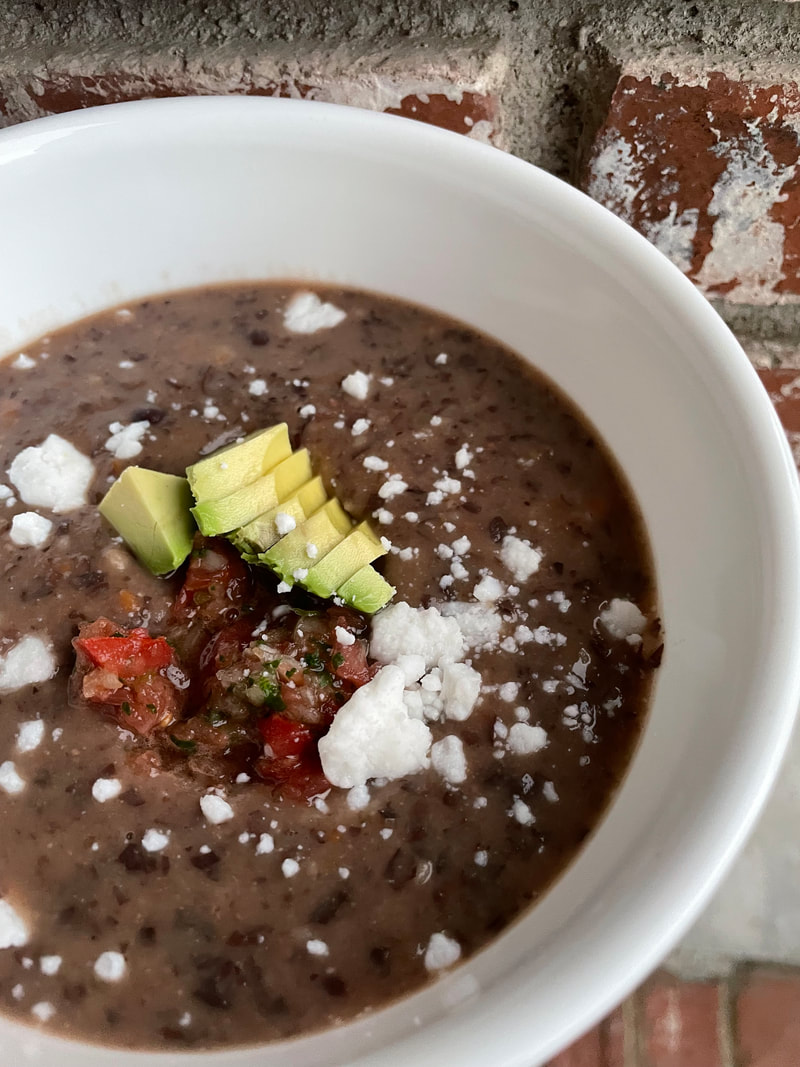
3 Comments
All-righty then. Here is the Vegan Philly Cheesesteak recipe, those of you - you know who you are ;) - have been asking for. This is the basic version, just steak and whiz. You can add any combo of grilled onions, peppers, mushrooms, etc, that you like. Enjoy!! The Whiz Makes 2 ¼ cups (enough for 8 cheesesteaks) 6 ounces russet potato, peeled, cubed (about 1 ½ cups) 1 ½ cups plain, unsweetened almond milk 3 tablespoons vegan mayo 2 tablespoons refined coconut oil 1 tablespoon white or yellow miso 1 tablespoon lemon juice 2 tablespoons nutritional yeast 2 tablespoons tapioca starch 2 teaspoons arrowroot powder ½ teaspoon smoked paprika ½ teaspoon salt ¼ teaspoon turmeric ¼ teaspoon ground mustard ⅛ teaspoon white pepper Using a steamer basket, steam potatoes 8 to 10 minutes until very tender. Transfer to blender. Add remaining ingredients to the blender, and puree until smooth. Pour blended mixture to a small saucepan, and heat over medium. Stir occasionally with a whisk, 4 to 6 minutes, until it bubbles, and becomes thick and gooey. At a point during the heating, the cheese might start to get lumpy. This is just the thickeners taking action. Keep whisking and things will smooth out. Keep warm until ready to use. The Vegan Philly Cheesesteak Makes 2 cheesesteaks 1 block super firm tofu (16 oz) ½ cup The Wit (caramelized onions, recipe above) 4 cloves garlic, grated or minced ¼ cup soy sauce ¼ cup beef-style broth 2 teaspoons maple syrup 2 tablespoons mayo 1 teaspoon steak/grill seasoning 1 teaspoon tomato paste ½ teaspoon liquid smoke 1 tablespoon light cooking oil ½ cup The Whiz (recipe above), warmed, plus additional for garnish 2 8-inch soft italian hoagie rolls split and opened lengthwise, but not cut all the way through The Method Using a slicer or mandoline, thinly shave through one of the the narrow sides (not the wide side) of the tofu block to make approximately ⅛ inch-thick by 1 ½ inch-wide ribbons. If you don’t have a slicing device, you can place the tofu in the freezer for about 20 minutes to firm it up, then use a very sharp knife to slice the tofu into ribbons. To a flat griddle or wide pan, add oil, and heat to medium high. Add the tofu, spread it out evenly, and fry it for 6 to 8 minutes, stirring occasionally and breaking the pieces up with a spatula or spoon. In the meantime, to a measuring cup or mixing bowl, add the garlic, soy sauce, broth, maple syrup, mayo, steak seasoning, tomato paste, and liquid smoke. Whisk to combine. Once a good amount of the tofu has browning, add the mayo/soy sauce mixture, and any cooked toppings, and fold them into the tofu. Cook, stirring frequently, 1 to 2 minutes until sauce is mostly absorbed and cooked into the tofu. Next, quickly fold in ½ cup of The Whiz, and 2 tablespoons water. Once The Whiz is incorporated, divide the tofu into 2 oblong piles roughly the length and shape of the rolls. Open the rolls and place them face down on top of the meat piles, and press gently. The water you added will not only help keep the meat moist, but it will help steam the buns. After about 30 seconds, slide a long thin spatula under one of the sandwiches to separate the meat from the pan. Place your other hand on top the bun, and in one motion, use the spatula to lift the upside-down sandwich off of the pan, and flip it over so that it is now sitting right side up in your other hand, with the meat stuffed inside. Repeat with the other sandwich. Place on plates or a cutting board, and drizzle an additional tablespoon of The Whiz over top of each. Cut in half crosswise and serve. 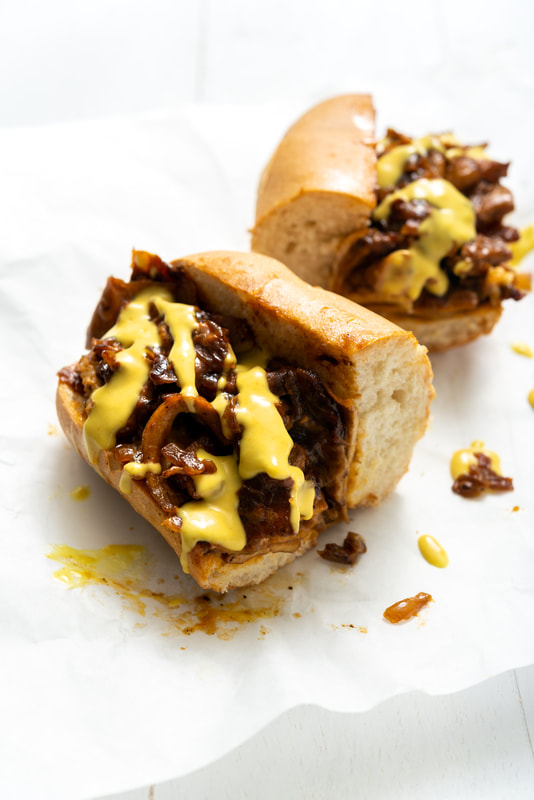 My kids with me at the grocery store: "OOOh!! Get some bananas!" Me, in my head: "They never eat the goddamn bananas." Me (responsibly) out loud: "You never eat damn the bananas." Them: "Yes we..." Me: "You don't." Me, at home several days later with the goddamn bananas: "Oh, a snack, you say? Well I have your perfectly ripe (i.e. goddamn) bananas right here." Them: "Mmmmmmm, no thanks." Me, in my head and also out loud: "Goddamnit." So heres a recipe for banana bread. I measure dry ingredients in grams mostly, it's more accurate and consistent. Makes 1 loaf. Wet Mix 3 super ripe bananas 80g brown sugar 1/3 cup olive oil 2 tablespoons plain unsweetened milk 2 teaspoons apple cider vinegar 2 teaspoons vanilla Dry Mix 225g all-purpose flour 1 teaspoon baking soda 3/4 teaspoon cinnamon 1/8 teaspoon ground cardamom 1/2 teaspoon salt 40g rolled oats, plus more for topping 50g mini chocolate chips, plus more for topping Heat oven to 350° F. In a medium bowl, mash the bananas. You won't get all the little chunks, but that's ok. Add the sugar, oil, milk, vinegar, and vanilla, and whisk to combine. In a separate bowl, add the flour, baking soda, cinnamon, cardamom, and salt. Whisk to combine. With a rubber spatula, stir the dry mix into the wet. When it's about half way combined, add the oats and chocolate chips and continue folding the batter together, until there are little to no dry spots left. A few patches of unincorporated flour in the batter is ok. It's important to the texture to not over-mix. Grease a loaf pan, and pour in the batter. Sprinkle some additional oats on top, then sprinkle chocolate chips. Bake 45-50 minutes, until a toothpick can pass through it and come out mostly dry. Let rest 10 minutes, then remove from the pan and let cool completely on a wire rack. Watch with pleasure as your kids finally eat those goddamn bananas, while simultaneously topping off the swear jar, and praying you don't get a call from the school. Enjoy! 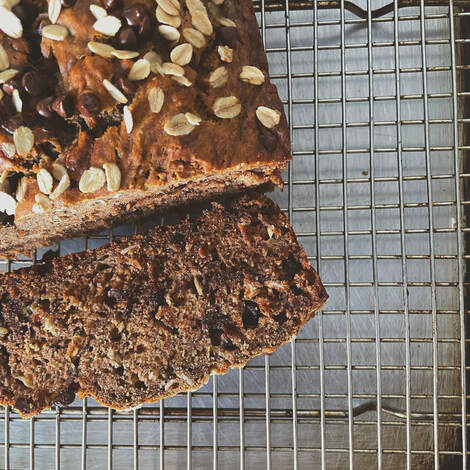   Yeah, like I said. It's perfect. And easy. I haven't tried it with Just Egg, solely because it's more expensive than Follow Your Heart's Vegan Egg, and the FYH egg works so well, I have no need to change anything. I will say the new formula they're using for Just is a serious texture upgrade when in a scrambling situation. For this recipe, I used super thick "Texas Toast", it's probably over an inch thick. Thinner bread works too, but you won't need as much batter or to cook them as long. The two most important parts are letting the bread get slightly stale, and cooking them low and slow. Letting the bread dehydrate on a wire rack overnight, makes for better absorption and texture, and cooking them low and slow, ensures the vegan egg cooks all the way through, before burning the outside. Also if you have a little digital scale that measures grams, that's the most accurate. I highly recommend getting one. Vegan French Toast Perfection Enough batter for 8 thick slices of bread. 8 slices thick cut day old bread 20g Follow Your Heart Vegan Egg Powder (about 4 tablespoons) 340g cold water (about 1 1/2 cups) 80g plain unsweetened milk (about 1/3 cup) 60g granulated sugar (about 1/4 cup) 2 teaspoons ground cinnamon 1/2 teaspoon vanilla extract 1/4 teaspoon salt pinch ground nutmeg light oil for frying butter for serving syrup for serving powdered sugar for serving In a large measuring cup add the water and egg powder, and whisk vigorously until thickened. Whisk in the milk, sugar, cinnamon, vanilla, salt and nutmeg. Pour batter into a vessel with high sides (like a small casserole), so that the batter is about 1/2 inch deep. Heat a half teaspoon of oil in a wide non stick or well seasoned cast iron skillet (or several skillets for speed and efficiency) to medium low. Submerge a slice of bread in the batter, and turn it a few times to make sure it's completely coated. Immediately place in the heated pan. There should be a very low sizzle. Cook 5 to 7 minutes until browned and caramelized, then flip, adding a little more oil to make sure the other side doesn't stick. Cook 5 to 7 minutes until browned and caramelized. Serve with butter, syrup, powdered sugar, sausage, egg, etc.  pictured with Beyond Breakfast Sausage and Just Egg scramble These waffles will forever be etched in my personal history as the thing we were eating that Saturday morning in November when it was announced that we officially booted budding fascism out of the White House, and projected Joe Biden the winner of the 2020 presidential election. I’d say we began crying tears of joy, but we were already crying tears of joy because these waffles were so damn good. Also my kids were crying, but that was because I was handily destroying them in a game of Mouse Trap...no mercy, losers. Anyway, I highly recommend you get a little scale that has a metric function for all of your baking, I make no guarantees when using cups for the flour because it’s quite inaccurate. Also I haven’t tested all the different types of vegan egg equivalents for this recipe, but you may do so at your own risk. I imagine the differences would be negligible. Also, also I do not have the bandwidth to style, shoot, and edit any fancy pics, so just close your eyes and imagine they look nice. Spiced Pecantifa Belgian Waffles Makes six waffles. 2 cups plain unsweetened almond milk 2 tablespoons apple cider vinegar 200g all purpose flour (about 1 ½ cup) 120g whole wheat pastry flour (about ¾ cup) 3 tablespoons granulated sugar 2 tablespoons baking powder 1 tablespoon ground cinnamon 1 teaspoon salt ¼ teaspoon ground cardamom ¼ teaspoon ground allspice ⅛ teaspoon ground clove ¼ cup olive oil 1 tablespoon vanilla 1 Follow Your Heart vegan egg (or other egg equivalent) ⅓ cup toasted chopped pecans In a measuring cup add milk and mix in vinegar to make “buttermilk”. Set aside for 15 minutes while you prepare the dry ingredients. Into a large mixing bowl sift together both flours, sugar, baking powder, cinnamon, salt, cardamom, allspice, and clove. Into the “buttermilk” whisk in the oil and vanilla. Add milk to the dry ingredients and fold together with a spatula. When it’s about half way mixed together, add the egg and pecans, and stir until combined. Let the batter rest for 10 minutes while you heat up your waffle iron. Oh yeah, you’ll need a waffle iron, don’t forget that part. Depending on the size and style, the amount of batter you’ll use per waffle will vary. I used a standard Belgian waffle maker, but whatever you got will work. Just follow the instructions for your specific unit in terms of batter amount per waffle. Once your waffle maker is ready, proceed with the waffle making. For the standard Belgian waffle size, I use 1 scant cup of batter, and cook it a total of 6 minutes, according to the instructions on my maker. Actually the instructions on my maker said they’d take 3 minutes total, but I don’t know what the hell they’re talking about, it wasn't even close. So a little trial and error will be in order with whatever waffle maker you have. Serve with waffle stuff. Enjoy! 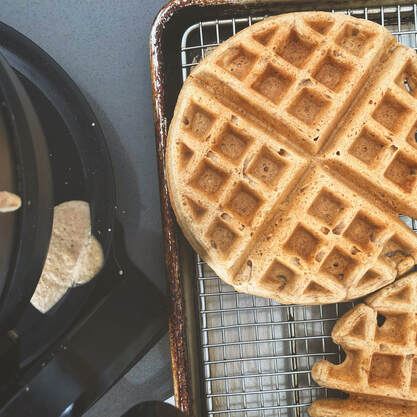 If you don’t have the apple cider or don’t want to use it, the basic recipe that I make uses all almond milk (1 ¼ cup). Makes 8 pancakes ½ cup plain unsweetened almond milk 1 tablespoon apple cider vinegar ¾ cup Fresh and Easy Apple Cider 1 tablespoon extra virgin olive oil 1 teaspoon vanilla extract 100g all-purpose flour (about ¾ cup) 60g whole wheat pastry flour (about ½ cup) 2 tablespoons granulated sugar 1 tablespoon baking powder ½ teaspoon salt Light oil for frying Into a measuring cup, add milk, and stir in vinegar. Set aside for at least 15 minutes, then stir in cider, olive oil, and vanilla. Into a mixing bowl, add flour, pastry flour, sugar, baking powder, and salt. Mix to combine. Add liquid mixture to the flour, and gently mix with spatula until just combined. Don’t over mix. Let batter rest for 10 minutes. It will bubble and rise slightly. Heat pan or griddle, somewhere around medium low or medium. Swirl a touch of light oil around the pan to coat. Stir the batter one last time to deflate it a bit. Scoop ⅓ cup portions of batter into the pan, it should gently sizzle, and spread out on it’s own. Fry 2 to 3 minutes per side, until golden. Serve with usual pancake stuff. Finally, look at this picture first, then close your eyes and imagine a nice picture of pancakes. Enjoy!  My kids were bugging me for apple cider, so I almost bought some at Trader Joes, and then I was like, “Wait, I can frickin’ make that.” So I did, and it was easy and very tasty. Fresh and Easy Apple Cider Makes 2 ½ to 3 quarts 10 apples, (I used all Honeycrisp for this) quartered 1 orange peeled and quartered (preferably with a knife, so as to remove as much as the white pith as possible) 4 quarts water 3 cinnamon sticks 1 tablespoon whole cloves 3 to 6 tablespoons granulated sugar Pinch salt Into a large stock pot, add apples, oranges, water, cinnamon sticks, and cloves. Bring to a low to medium boil, and cook, uncovered 1 hour. With a wooden spoon or potato masher, mash the apples and oranges until the mixture looks like a very loose applesauce. Reduce heat to low and simmer with the lid placed slightly askew. Simmer for 2 hours. Into another pot, strain out the solids through a fine mesh strainer or cheesecloth, pressing on the apples to get as much liquid out of them as possible. The cider won’t be completely clear, there will still be some pulp in the mix, which is how it should be. Because apples can vary in sweetness, we won’t add all of the sugar right away. Bring the cider back to a low simmer and whisk in 3 tablespoons of the sugar and the salt until dissolved. Give it a taste and add more sugar as desired. When I made it, 6 tablespoons was just right. Serve warm. Store leftover in the fridge for up to 4 days. Use leftovers to make these Apple Cider Pancakes. I do not have the capacity to take nicely styled pictures of things (or to shave, apparently) these days (not that I really ever did), but here is the finished cider in it’s storage container. You can close your eyes and imagine a nice picture of it if you have to. It's brown-ish, like apple cider. Enjoy!  This is the Most Poorly Executed Blog Post Ever But its Vegan Easter Pie, So You Still Love It4/8/2020 Here it isYeah, so I had a recipe years ago, but then I updated it in the last couple of years since the new egg replacers and such have been available. I made this one last year, and it has been my best Easter pie recipe to date. Every Easter I get messages like, "Where is that vegan Easter pie recipe?" Well, here it is. I don't even have a picture of it, but it looks and tastes like Easter pie. Vegan Easter Pie Makes one 9 inch pie ¼ cup diced super firm tofu ¼ teaspoon black salt (kala namak) 12 ounces vegan italian sausage crumbled and cooked 5 ounces other vegan meat (ham, bacon, or more sausage), crumbled or chopped 2 ounces vegan pepperoni, chopped 8 ounces vegan ricotta cheese ½ cup vegan mozzarella 2 Follow Your Heart Vegan Eggs (or 2 Just Eggs) Pie crust 2 tablespoons aquafaba (liquid from a can of chickpeas) Heat oven to 350F°. In a large mixing bowl, add the tofu and black salt, toss to coat, then add the meats, cheeses, and eggs and mix to combine. This is your filling. Press pie crust into a pie pan and add the filling. Place the top crust on top and crimp the edges to seal. Poke the top of the pie with the tines of a fork 5 or 6 times, then brush the top with aquafaba. Bake 50 to 60 minutes until the top is golden brown. Remove from oven and let rest at least 30 minutes before cutting. Update... I took a picture, like a good blogger... Mall food courts are typically barren deserts when it comes to vegan or even vegetarian eating. So I was super stoked when I was invited to check out the new Beleaf Cafe. Brand new to the Westfield Century City and Westfield Topanga Malls, this eatery serves up burgers, tacos, burritos, salads, and all kinds of sides and snacks..and it's ALL FRICKIN' VEGAN!!!  I stopped by for lunch and went with the Southwestern Burger. It's an Impossible patty with grilled onion, pickle, bbq sauce, red cabbage, and I added some Follow Your Heart cheese. A major alteration I made was the patty. You can swap any burger patty into any of the burgers. I definitely love the Impossible patty, but Beleaf offers a variety of interesting looking house-made vegetable-based patties, and since it had been a while since I ate any burgers that didn't have Beyond or Impossible meats, I thought I'd kick it a little old-school-vegan style and give their black bean patty a try. The food came out fast, and it all looked fresh and vibrant. I always like to take a little piece of the burger patty to taste it by itself. Flavor-wise, it was tasty with some mild spices, and the texture was what I expected from a bean patty. It was soft, but not crumbly, as many tend to be. I liked the bun-to- stuff ratio. There was just enough bun to hold all of the toppings and such, but not so much that you feel you're eating a loaf of bread. Overall the burger was delicious, and the whole thing worked together nicely. 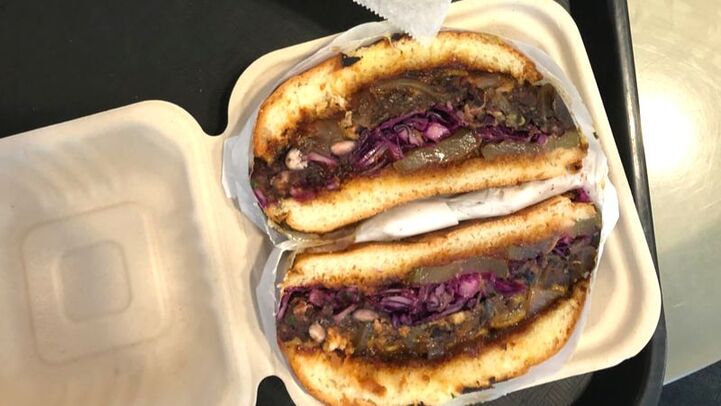  I added an order of buffalo cauliflower, which was also quite satisfying. A standard buffalo-style sauce drenched crispy, al dente-cooked cauliflower. Instead of the usual creamy ranch, or bleu cheese type sauce to go with the wings, they serve it with a side of their tahini sauce. I wasn't so sure about it at first, but I ended up liking it quite a bit. The fatty tahini sauce served the same cooling purposes as the regular sauces, so I was good with it. I'm looking forward to tying more of the menu items, as there are A LOT! It's so excellent and exciting to have this vegan oasis in my local mall's food court. All VEGAN! In a FOOD COURT! In a MALL!!! What a great time to vegan. So, whaddayagot? Labor Day coming up? Memorial Day? Just your run of the mill summer grilling weekend? I got you covered here. I took some Beyond Meat beef and brats, and mashed them together in these adorable little pretzel bun meatball sliders. Check it out. You're gonna turn some heads. Beyond Beer Brat Ball Sliders Makes 20 sliders 1 sweet yellow onion, sliced 4 light flavored beers (no IPA's or strongly flavored brews) 10 ounces Beyond Beef 2 links Beyond Sausage Brats, casings removed 1 vegan egg substitute (I use Follow Your Heart Vegan Egg, but I imagine Just, or a flax or chia egg will work as well) 1/2 cup finely ground salted pretzels 4 cloves garlic, grated 2 tablespoons chopped Italian parsley 1/4 teaspoon salt 1/8 teaspoon pepper 5 pretzel buns, quartered (or 20 regular slider buns) 1/2 cup grain mustard (approximately) 1/2 cup sauerkraut (approximately) 4 wooden skewers, soaked in water for at least 30 minutes grill spray 20 sandwich picks Heat a grill to high. In a wide pan with high sides, add the beer and onions, and cover with foil (which I didn't show in the video, oops!). Place on one side of the grill, and let it hang out and simmer away. Plan to have it simmer at least 30 minutes before you add the balls to really get those onions tender. In a mixing bowl, add beef, sausage, egg, ground pretzel crumbs, garlic, parsley, salt, and pepper. With a clean or gloved hand, mash ingredients together until combined. Divide mixture into 20 ping pong ball sized portions (a 1-ounce ice cream scooper works well here). Shape them into round balls, and place them on a pan or plate lined with parchment. Cover and chill in the fridge 15 to 20 minutes to help them firm up before skewering. Remove the skewers from the water, and slide 5 balls onto each one. Place on a plate covered with parchment and take them out to the grill. Spray the available side of the grill with grill spray, and gently place the meatball skewers on the grill. Grill 2 minutes, until browned and/or grill-marked, then, using a thin metal spatula, separate balls from the grill, and gently flip them over, and grill on the other side 2 minutes. Remove meatballs from the grill and immediately transfer them to the simmering beer and onion bath. You can leave them on the skewers or remove them. No need to re-cover the beer pan. Simmer in the beer for 10 minutes, then remove the pan from the grill, and begin to build the sliders. Slather the bottom buns with mustard, then top with onion. Add a ball to each bun, then top with sauerkraut, and finally the top bun. Hold it all together with a sandwich pick. Repeat for all sliders. Serve immediately. 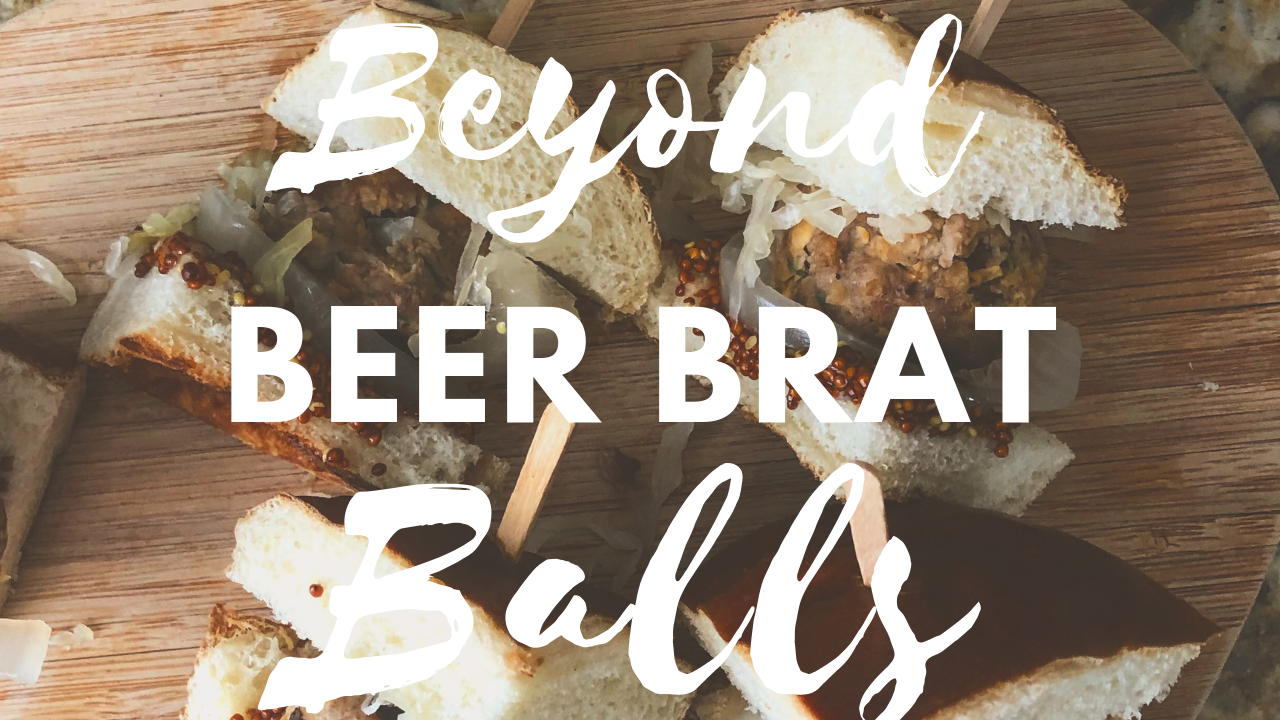 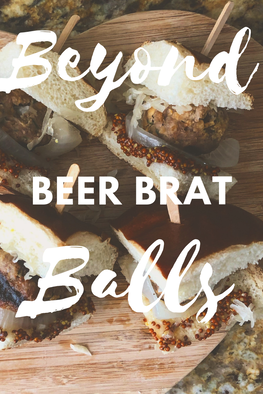 |

CREATORVegan chef, cookbook author, and multi-media personality, Brian L. Patton. Just making good, old-fashioned food. You like food, right? Archives
January 2023
Categories |
 RSS Feed